
Creating Your Own AddOn Window
The NTWindow Class
The NTWindow class allows you to quickly build windows using the same style and skin as other windows in NinjaTrader. An NTWindow does not contain user-interface functionality, but rather serves as a container for instances of NTTabPage, which will contain controls and functionality for the window.
Using TabControl for Tab Functionality
After declaring an NTWindow, you can enable tab functionality on it (creating new tabs, copying tabs, etc.). The process for implementing tab functionality must be done within the constructor for your NTWindow, using the following process:
- Instantiate a new TabControl object
- Call helper methods of the TabControlManager class, passing in your TabControl object as an argument, to enable specific functionality
- Use the same approach as #2 to set an NTTabFactory for your TabControl (see below for more information)
- Set the Content property of your NTWindow to your TabControl
Note the instantiation of a new AddOnFrameworkWindowFactory in the example above. In this example, AddOnFrameworkWindowFactory is a custom class implementing the INTTabFactory interface. Within this class, the CreateParentWindow() and CreateTabPage() methods contained in INTTabFactory are hidden, as seen below:
Take note of the instantiation of the AddOnPage class in the example above. In our example, AddOnPage is a XAML-defined class. Thus, when CreateTabPage() is called on an instance of AddOnFrameworkWindowFactory, it instantiates our XAML-defined user interface. See below for more information on defining user interfaces in XAML.
Creating an NTTabPage within an NTWindow
With an NTWindow defined and a TabControl set up, the next step is to instantiate an NTTabPage and add it to your TabControl. The first step is to define a class inheriting NTTabPage and implementing the IInstrumentProvider and IIntervalProvider interfaces to set up window-linking functionality.
With this class defined, the next step is to add it to your TabControl. You can do this via the AddNTTabPage() helper method contained in your TabControl object:
Setting Up Workspace Persistence
The last step in setting up the foundation for your custom window is to configure it to be saved and restored in NinjaTrader workspaces.
- Hide the WorkspaceOptions property of the implemented IWorkspacePersistence interface
- Use a delegate to set the WorkspaceOptions property to a new instance of the WorkspaceOptions class inside the NTWindow’s constructor
- Hide the Restore() method of IWorkspacePersistence to call the static RestoreFromXElement() method on the MainTabControl property
- Hide the Save() method of IWorkspacePersistence to call the static SaveToXElement method in the same way
Using XAML to Define Window Layout
There are two options available for laying out the user interface in your NTTabPage. The first is to use XAML, a markup language commonly used to define graphical interfaces in WPF applications. The process of pairing a XAML file with your C# classes is straightforward; simply create your XAML class in its own file within your project, and it can be packaged together with your C# code in a DLL.
Using C# to Define Window Layout
You are not required to use XAML for window layout. You can code everything in C# if you choose. Defining user interface elements in C# is more verbose than XAML, but all of the same functionality is available. The example below shows the C# equivalent of the XAML code in the prior section.
Launching Your Window From the Control Center
Once your window is set up and laid out, you will need a way to launch it from the Control Center. This can be done by adding a new item into one of the Control Center’s menus (most commonly the New menu). This can be accomplished in four steps:
- Obtain a reference to the Control Center menu in question
- Instantiate an NTMenuItem
- Add your NTMenuItem into the menu
- Attach your NTMenuItem’s Click event to a custom event handler
- Use your custom event handler to launch your NTWindow
As always, it is important to unsubscribe from event handlers and dispose of unused resources when they are no longer needed. The OnWindowDestroyed() method can be used to clean up our work from the examples above:
Adding NinjaTrader Custom Controls
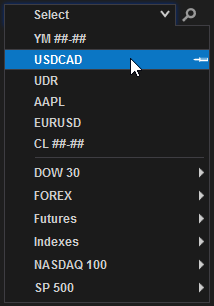
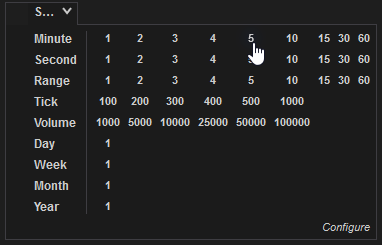
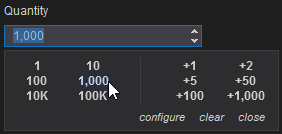
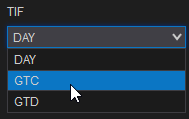
User-interface controls, such as buttons, text fields, and dropdown menus can be defined via XAML (or C#), then behavior and functionality of those controls can be set via C# along with the core logic of your AddOn. In addition to the standard WPF controls, the NinjaScript AddOn framework provides access to each of the custom NinjaTrader controls that can be found throughout the platform. Below is a list of the most commonly used NinjaTrader controls, along with examples of defining these controls in XAML and adding functionality to them in C#:
1. The Instrument Selector
2. The Interval Selector
3. The Quantity Up/Down Selector
4. The Time-in-Force Selector
5. The ATM Strategy Selector
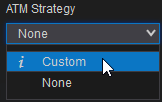
Using the ATM Strategy Selector
Linking with Other Windows
If you utilize NinjaTrader controls to allow selection of instruments or intervals, you can add instrument or interval linking functionality to your window. The PropagateInstrumentChange() and PropagateIntervalChange() methods can be used to accomplish this. To call PropagateIntervalChange(), use the process below:
- Hide the Instrument property of the IInstrumentProvider interface, which your NTTabPage inheriting class should be implementing
- Call PropagateInstrumentChange() within the setter for the hidden Instrument property
In a real-world scenario, you would most likely use an instrument selector to call the setter for the Instrument property. Thus, when a user toggled the instrument selector, PropagateInstrumentChange() would be called in addition to any other logic you put in place. In the same way, you can use an interval selector to push changes to the Interval Linking feature. In this case, you can attach a custom event handler to an interval selector’s IntervalChanged event, then call PropagateIntervalChange() within that event handler: